A Beginner’s Guide To Soil Contamination Testing In The Carolinas

By Kerry Cooper

Whether you’re planning to build a home or redevelop a site for commercial project, one question you’ll want answered early is: Is the soil clean and safe to build on?
After all, soil contamination is more common than we usually think. And it doesn’t always show up on the surface.
In fact, contaminants can be hiding deep underground, left behind from past industrial activity, leaking underground tanks, pesticides, or chemical storage.
And if you don’t test for it before you build, you could be facing safety issues, regulatory trouble, and major remediation costs later.
In this blog, I will walk you through all things soil contamination testing in the Carolinas. You’ll know what it is, why it matters, how it’s done, and what contaminants it looks for.
So, let’s get started.
Key takeaways
- Soil can look clean but still be contaminated underground
- Testing helps avoid health risks, delays, and surprise costs
- Many projects in both North and South Carolina require soil testing before permits
- The process follows clear steps, and not random sampling
- Finding contamination early makes cleanup easier and cheaper
What is soil contamination testing?
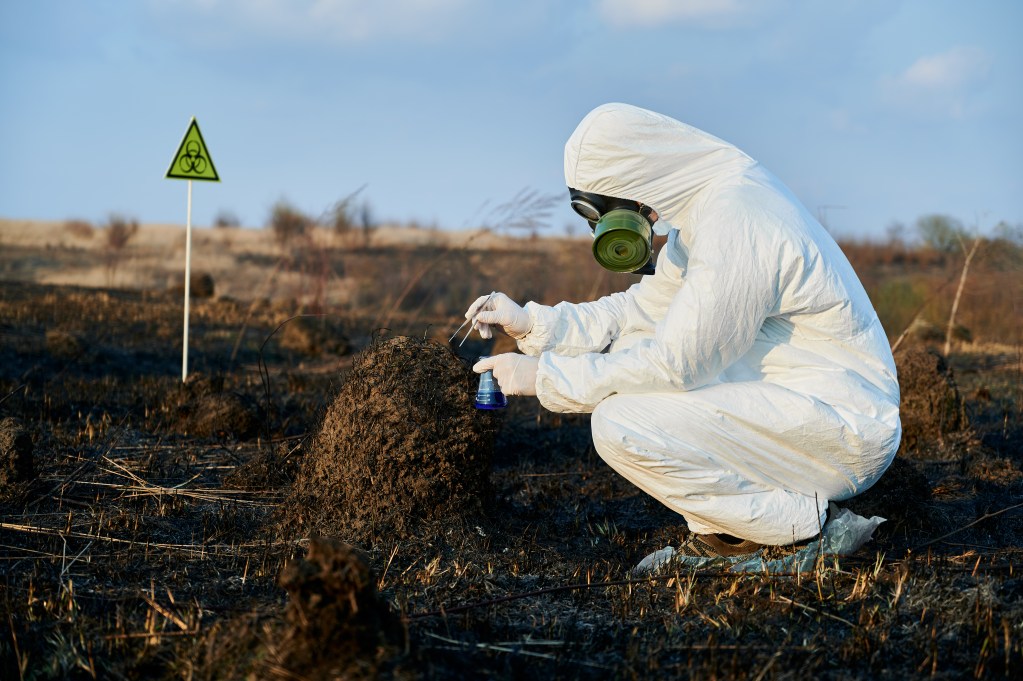
At its very basic, a soil contamination test checks the ground to see if anything harmful is hiding in the soil.
You see, a property might look clean on the surface. But past activities like farming, fuel storage, or industrial use can leave chemicals behind underground for decades.
So, a contamination test helps answer a few important questions like:
- What substances are present in the soil?
- How much of the contaminants are there?
- Do those levels exceed health or EPA’s regulatory limits?
Here, labs test the soil for contaminants such as:
- Heavy metals like lead, arsenic, and mercury
- Petroleum products from fuel or oil leaks
- VOCs and SVOCs often linked to solvents or industrial chemicals
- Pesticides and herbicides from agricultural use
- PFAS or forever chemicals
Once results are in, engineers can determine whether the soil is safe to build on or if cleanup is needed before moving forward.
Don’t Let Site Conditions Delay Your Project
From geotechnical reports to environmental assessments, and more, our ACI-certified experts deliver the data and insights you need to stay on schedule.
When is a soil contamination test typically required?
Soil contamination testing is usually required when there’s a chance that past or present land use might have affected the ground.
In fact, in many cases, testing isn’t optional, it’s required by local agencies, lenders, or environmental regulators before a project can move forward.
Overall, here’s when you might need contamination testing:
1. Before new construction
Before any construction begins, cities, counties, and lenders require soil testing as part of their permitting process.
You’ll need a contamination test even before you measure the moisture content of soil or prepare the site for foundation work.
This is especially true for commercial buildings, multi-family developments, or sites with a long history of use.
Here, testing helps confirm the soil is safe for workers during construction and for people who will live or work on the property later.
2. During property purchase or sale
Soil testing is often part of environmental due diligence when you’re buying or selling a property.
As a buyer, you want to know exactly what they’re getting into. And as a seller, you want to avoid future liability.
That’s because if soil contamination is found after a sale, it can lead to disputes, cleanup costs, or even legal action.
3. Before redevelopment
Redevelopment projects often involve land that has been used before, sometimes many times.
There could have been old factories, gas stations, rail yards, and even farms. And they might have left chemicals in the soil decades ago.
Soil testing helps identify what’s still present and whether it poses a risk to new construction.
4. Near underground storage tanks
Underground storage tanks, especially older ones, are a common source of soil contamination.
Even if a tank was removed years ago, fuel or oil might have leaked into the surrounding soil.
So, testing around former or existing underground storage tanks help confirm whether leaks occurred and how far contamination may have spread.
5. When there is visible contamination
Sometimes the warning signs are obvious. There could be stained soil, strong chemical smells, or records of past spills, all contamination red flags.
These signs suggest contaminants might be present below the surface, even if the area looks stable.
Here, testing helps confirm the extent of the issue and determines whether cleanup or additional investigation is needed before the site can be safely used.
In short, here’s when soil contamination test is needed:
| Situation | Why Testing Is Needed |
| New construction | Permits and lenders often require it |
| Buying or selling property | Reduces legal and financial risk |
| Redevelopment projects | Past uses may have caused contamination |
| Near storage tanks | Old leaks may still affect soil |
| Visible signs of contamination | Stains or odors signal potential problems |
How to test soil for contaminants?

A soil contamination test follows a step-by-step process expertly designed to remove guesswork and avoid unnecessary digging or costs.
Here, instead of randomly testing soil, engineers take a planned approach based on the site’s history and intended use.
Each step builds on the one before it, helping identify risks, focus testing where it matters most, and clearly determine whether or not the soil is safe.
Let’s see how engineers test soil for contaminants:
Step 1. Preliminary assessment
The testing process starts with a Phase I Environmental Site Assessment. This is a paperwork-based review that looks at how the property has been used over time.
Engineers review historical maps, aerial photos, property records, and environmental databases to spot potential red flags.
The goal here is to identify areas where contamination might exist before any soil is disturbed. And if f risks are found, the project moves to hands-on sampling through a Phase II assessment.
Step 2. Sampling plan design
If testing is needed, an environmental or geotechnical engineering expert creates a sampling plan tailored to the site.
This plan decides where to collect samples and how deep to go. And it is based on things like past land use, suspected contaminants, and future construction plans.
Sampling locations are carefully chosen to target likely problem areas. This helps save time, reduce costs, and ensure results reflect real site conditions.
Step 3. Soil sample collection
Next, trained professionals collect soil samples in the field. They use clean tools, proper containers, and strict labeling procedures to avoid contamination or mix-ups.
Every sample is documented through a chain-of-custody process, which tracks it from the field to the lab. This ensures the results are accurate, defensible, and acceptable to regulators, lenders, and permitting agencies.
Step 4. Laboratory analysis
Once collected, samples are sent to a certified environmental laboratory. The lab tests the soil for specific contaminants using approved analytical methods.
Here, different tests are used depending on what’s being investigated, such as fuels, metals, or industrial chemicals. These methods measure exact concentrations in the soil, not just whether a contaminant is present.
The results provide reliable data that can be compared to health and environmental standards.
Step 5. Interpretation and reporting
After lab results are complete, engineers review and interpret the data. They compare results to federal guidelines and North Carolina or South Carolina standards to determine if the soil is safe. The final report explains the findings in clear terms and outlines next steps. Recommendations may include no action, soil removal, treatment, vapor controls, or additional testing. This report becomes a key document for permitting, financing, and project planning.
In short, here’s how soil testing for contamination is done:
| Step | What Happens |
| Phase I ESA | Records review to find possible risks |
| Sampling plan | Engineers choose where and how deep to test |
| Sample collection | Professionals safely collect soil samples |
| Lab analysis | Certified labs test for contaminants |
| Reporting | Results are explained with clear recommendations |
How does soil testing for contamination help your project?
Whether you’re building, buying, or redeveloping, knowing what’s in the ground allows you to make smarter decisions early, much before problems become expensive.
And soil contamination testing helps you do exactly that. It gives you real, practical information that helps protect people, avoid surprises, and keep your project moving forward.
Let’s have a look at how it helps:
1. Protects health
Testing identifies hidden hazards in the soil before construction begins. This helps protect workers during excavation and keeps future occupants from being exposed to harmful chemicals.
2. Reduces legal risk
Soil contamination at your project site can lead to fines, cleanup orders, or legal disputes later.
Testing helps you address potential issues upfront and meet local contamination treatment norms, like the ones set by the Department of Environmental Quality in North Carolina. This, in turn, reduces liability and protects you from unexpected costs down the road.
3. Helps with permitting
Many local and state permits depend on proving the soil is safe. And testing provides the documentation agencies need to approve your project.
In fact, having clear test results early prevents delays and keeps your construction timeline on track.
4. Improves property value
Properties with clear environmental data are easier to finance, sell, or develop as buyers and lenders prefer sites with fewer unknowns.
Soil contamination testing removes uncertainty and makes your property more attractive in the marketplace.
5. Supports remediation
If contamination is found, soil testing shows exactly where it is and how serious it is. This allows cleanup efforts to be focused and efficient, rather than expensive and unnecessary.
In short, here’s how soil contamination testing helps your project:
| Benefit | How It Helps You |
| Protects health | Keeps workers and occupants safe |
| Reduces legal risk | Avoids fines and future liability |
| Helps with permits | Speeds up approvals |
| Improves property value | Makes land easier to sell or finance |
| Supports smart cleanup | Targets only the areas that need it |
Don’t Let Site Conditions Delay Your Project
From geotechnical reports to environmental assessments, and more, our ACI-certified experts deliver the data and insights you need to stay on schedule.
Conclusion
By now, I am sure you know everything about soil contamination testing.
You see, this test is more than an environmental checkbox. It is an essential step that protects health, ensures compliance, and saves you money over the life of your project.
This is especially true for the Carolinas, where land use history varies from rural farms to industrial corridors and urban redevelopment sites. Here, a thorough soil contamination test is often the first smart move a developer or homeowner should make.
Got more questions or want to schedule a soil contamination test for your project site?
You can get in touch with us!
At NewTech Engineering, we are seasoned environmental site assessment experts with decades of hands-on experience serving both North and South Carolina. And we’ve got all your soil contamination testing needs covered on a budget.
FAQs about soil contamination testing
What is soil contamination testing and why is it important?
Soil contamination testing checks whether harmful chemicals, heavy metals, or pollutants are present in the ground.
It is important because contaminated soil can affect human health, groundwater, and the safety of buildings.
In the Carolinas, testing is often required before construction or redevelopment, especially on older or commercial sites.
When do I need a soil contamination test in North or South Carolina?
You usually need soil contamination testing if you’re buying land, planning new construction, redeveloping an old site, or working near underground storage tanks.
It is also common for commercial projects, industrial properties, and former agricultural land.
In many cases, local authorities or lenders require testing before permits are issued to make sure the site is safe and meets state environmental regulations.
What types of contaminants are typically tested in soil?
Soil testing commonly looks for heavy metals like lead and arsenic, petroleum products from fuel leaks, volatile organic compounds (VOCs), pesticides, and sometimes PFAS chemicals.
The exact contaminants tested depend on the site’s history. For instance, gas stations focus on fuel-related compounds, while old industrial sites require broader chemical testing.
How long does soil contamination testing take?
Most soil contamination testing projects take one to three weeks from start to finish. Sampling usually takes a day or two, while laboratory analysis can take one to two weeks.
What happens if contamination is found in the soil?
If contamination is found, it doesn’t always mean your project stops.
An engineer will evaluate how serious the contamination is and whether it exceeds allowable limits.
Solutions might include removing contaminated soil, treating it, or using protective barriers. Also, in some cases, monitoring is all that’s needed.
The goal here is to manage the risk safely and meet regulatory requirements.
Kerry Cooper is the founder of New Tech Engineering, He brings over 20 years of hands-on experience in geotechnical investigation, soil analysis, and foundation design across residential, commercial, and infrastructure projects. Kerry leads a team focused on delivering data-driven insights that help builders and developers make smarter, safer decisions from the ground up.